Pinout
- This page lists the pinout of the FLY-Super8 motherboard after flashing Klipper firmware. The pin numbers are based on the motherboard schematic.
UART/CSis the driver communication pin: used as UART with TMC2209, and as chip selectCSwith SPI drivers such as TMC5160. The same pin is shared between these functions.ENis the enable pin. In Klipper configuration, it is typically active-low (theenable_pinhas a!prefix).DIAGis the driver diagnostic signal pin. When using sensorless homing, configure the correspondingdiag_pinaccording to the table below. Some drivers may still require setting the DIAG jumper as described.
Interactive Pin Hotspots
The image below uses the FLY-Super8 product image and the same hotspot data from the Klipper configuration generator. Use the device filters above to show only compatible connectors; click a hotspot to see compatible devices, common Klipper configuration sections, and notes. Use “Locate in pin table” in the detail panel to jump to and highlight the corresponding row below. Hover still shows the connector name and pin. Always verify the silkscreen and connector positions against the physical board and schematic.
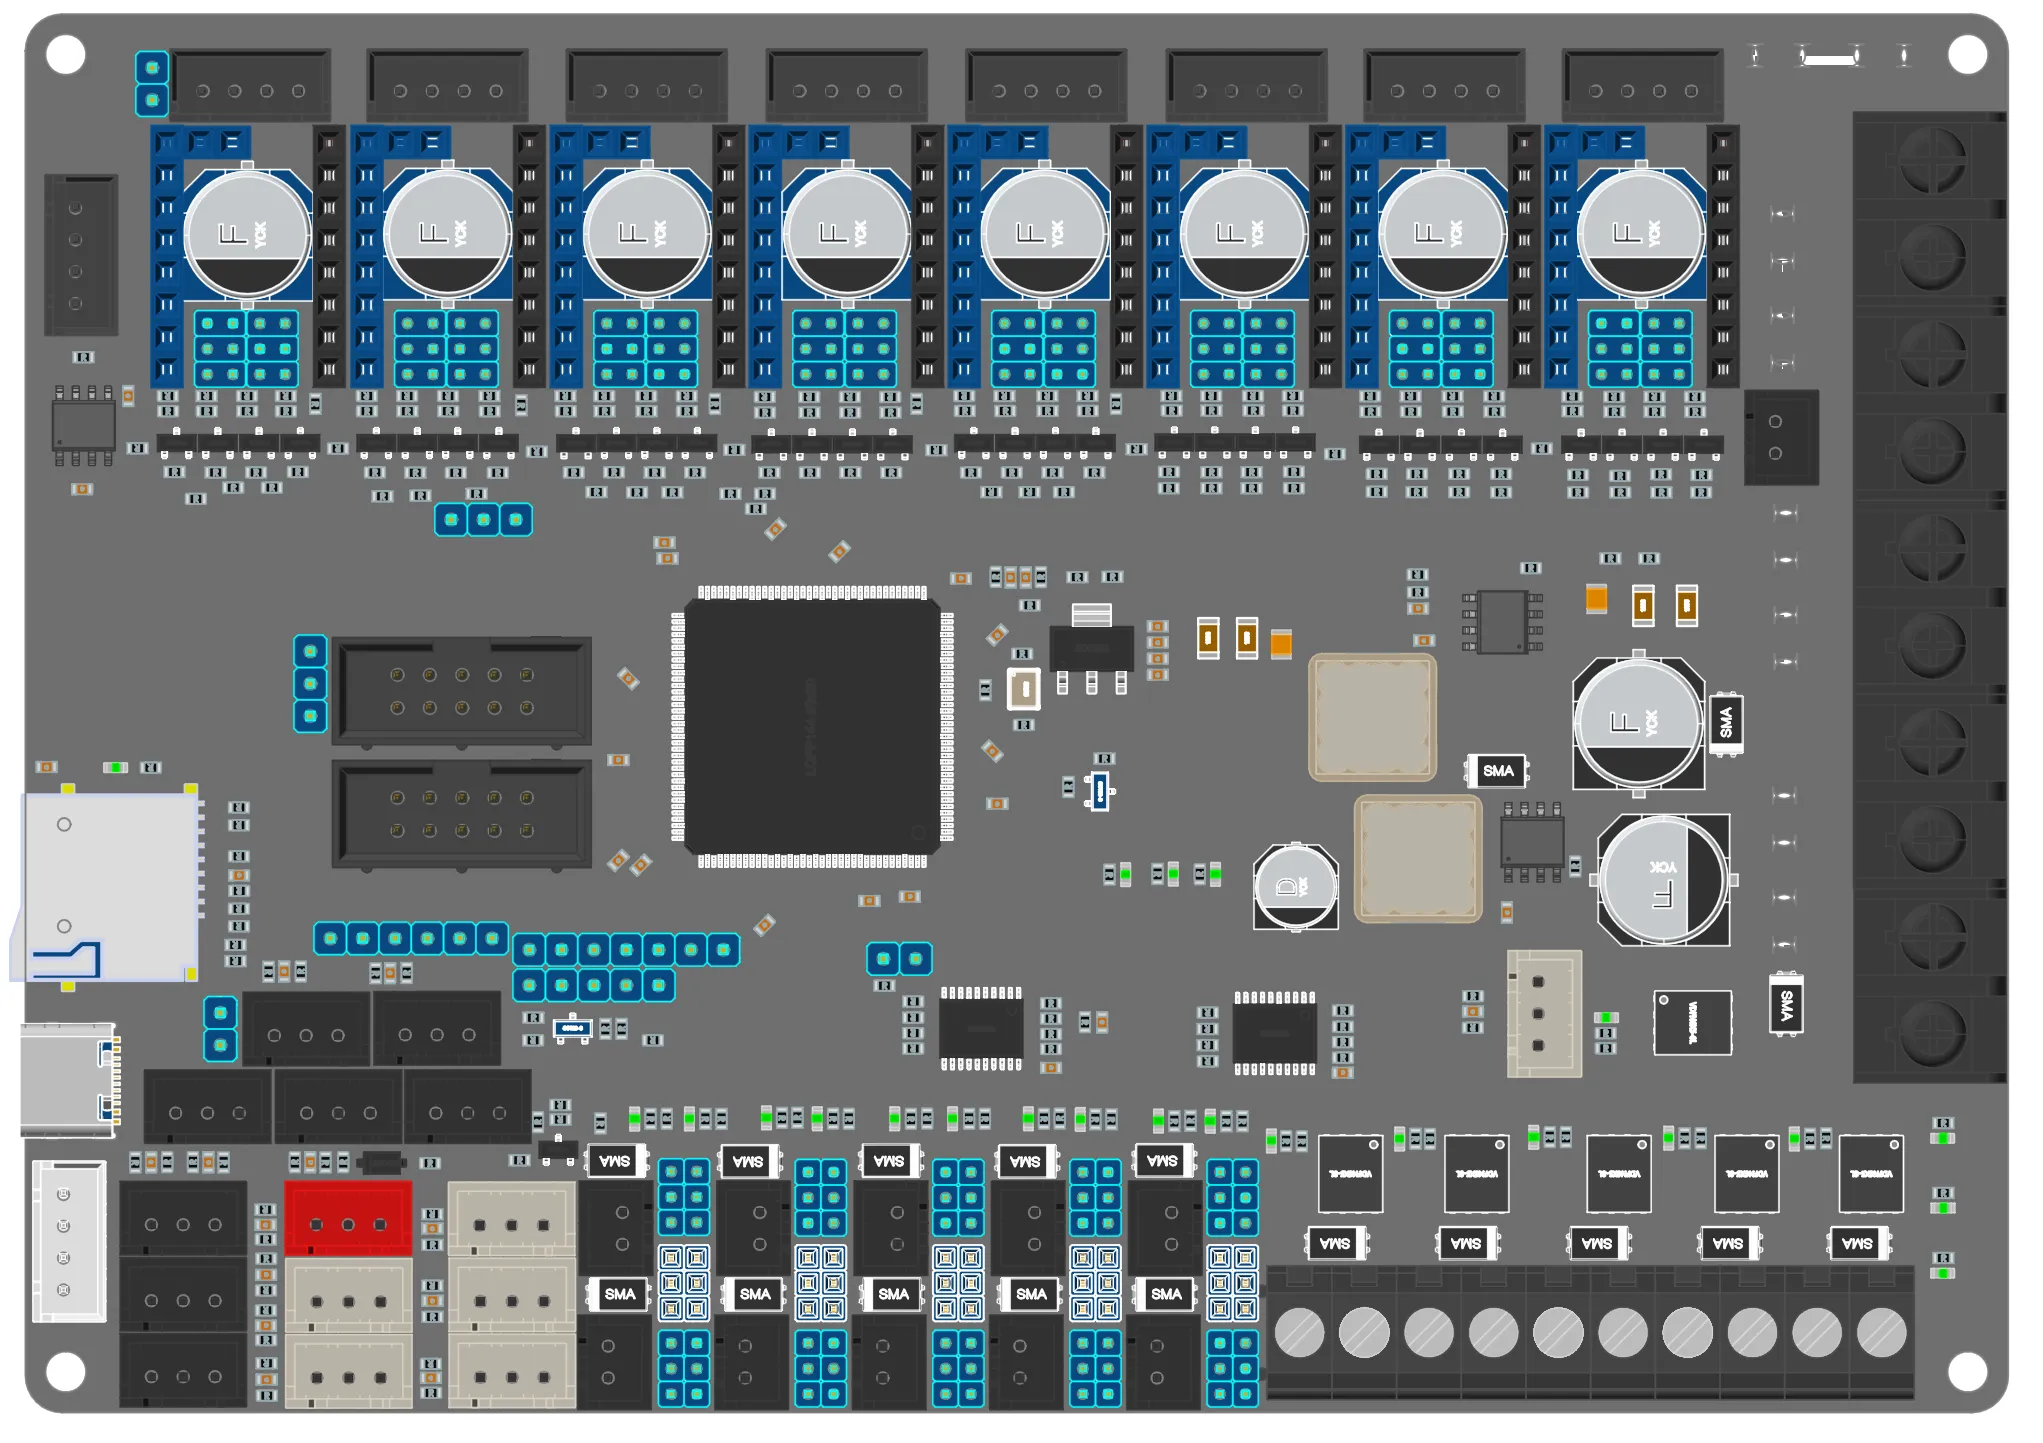
Hover to see the pin; click a hotspot to view compatible devices and configs. Pins can be copied from the detail panel, except for driver connectors.
Driver Pins
The FLY-Super8 provides 8 driver ports:
| Driver | STEP | DIR | EN | UART/CS | DIAG |
|---|---|---|---|---|---|
| DRIVER0 | PE2 | PC5 | PF11 | PC4 | PG12 |
| DRIVER1 | PE3 | PF13 | PF14 | PF12 | PG11 |
| DRIVER2 | PE4 | PG0 | PG1 | PF15 | PG10 |
| DRIVER3 | PE14 | PE8 | PE9 | PE7 | PG9 |
| DRIVER4 | PE15 | PE11 | PF2 | PE10 | PD7 |
| DRIVER5 | PE1 | PF0 | PC15 | PF1 | PD6 |
| DRIVER6 | PE0 | PG3 | PG4 | PG2 | PA8 |
| DRIVER7 | PE6 | PG6 | PG7 | PG5 | PF3 |
Before starting, completely shut down the printer and disconnect the power supply. Do not plug or unplug wiring harnesses, organize interface wiring, or touch terminals while the system is powered on.
When using sensorless homing, the driver chip outputs a stall detection signal through the DIAG pin, which Klipper needs to read via the corresponding input port. The correspondence between DIAG and the endstop ports on this motherboard is as follows:
- DRIVER0–6: The DIAG is directly connected to the corresponding endstop input port on the main MCU (DRIVERn → Endstop port n). There are no DIAG jumper pins on the board; the DIAG signal is always sent to the MCU. When enabling sensorless homing, directly configure the corresponding endstop port pin as
diag_pin. Do not connect a physical endstop switch to that endstop port. - DRIVER7: The DIAG is not directly connected to an endstop port. You must manually install the adjacent DIAG jumper cap to route the DIAG signal to PF3 (the DIAG shared port) before sensorless homing can be used.
After enabling sensorless homing, the corresponding endstop port is occupied by the DIAG signal and must not have a mechanical or optical endstop switch connected simultaneously.
SPI Bus
SPI drivers such as the TMC5160 use the motherboard's hardware SPI bus. In the configuration, simply set spi_bus: spi1a. There is no need to configure MOSI/MISO/SCLK pins separately:
[tmc5160 stepper_x]
spi_bus: spi1a
cs_pin: Corresponding driver UART/CS pin
Detailed explanation of software SPI and SPI speed, etc.: SPI Configuration Method
Endstops and Probe
| Function | Pin | Corresponding Driver DIAG |
|---|---|---|
| Endstop port 0 / IO0 | PG12 | DRIVER0 |
| Endstop port 1 / IO1 | PG11 | DRIVER1 |
| Endstop port 2 / IO2 | PG10 | DRIVER2 |
| Endstop port 3 / IO3 | PG9 | DRIVER3 |
| Endstop port 4 / IO4 | PD7 | DRIVER4 |
| Endstop port 5 / IO5 | PD6 | DRIVER5 |
| Endstop port 6 / IO6 | PA8 | DRIVER6 |
| HV-IN / General Input | PF3 | DRIVER7 |
| IN / PWM_OUT | PF8 | - |
| Probe | PC3 | - |
For wiring of micro switches, optical endstops, proximity sensors, and TAP, see: Endstop Wiring Guide
Heating
| Function | Pin |
|---|---|
| Heated Bed | PE5 |
| Heater Port 0 | PB0 |
| Heater Port 1 | PB1 |
| Heater Port 2 | PC7 |
| Heater Port 3 | PF7 |
| Heater Port 4 | PF6 |
Temperature Sensors
| Function | Pin |
|---|---|
| Thermistor Port 0 | PF4 |
| Thermistor Port 1 | PF5 |
| Thermistor Port 2 | PF9 |
| Thermistor Port 3 | PF10 |
| Thermistor Port 4 | PC0 |
| Thermistor Port 5 | PC1 |
The thermistor ports support NTC thermistors (100K) by default, with sensor_type recommended as Generic 3950; they also support 2-wire PT1000, configured by setting sensor_type to PT1000.
List of
sensor_typeoptions that can be directly connected internally by Klipper and their applicable scenarios: Thermistor Configuration Method
K-type thermocouples, 3-wire PT100, etc., require additional signal conditioning chips and cannot be connected directly to the thermistor ports.
Fans
| Function | Pin |
|---|---|
| Fan Port 0 | PA0 |
| Fan Port 1 | PA1 |
| Fan Port 2 | PA2 |
| Fan Port 3 | PA3 |
| Fan Port 4 | PA15 |
| Fan Port 5 | PB11 |
| Fan Port 6 | PB10 |
| Fan Port 7 | PD12 |
| Fan Port 8 | PD14 |
| Fan Port 9 | PD15 |
PWM
The FLY-Super8 provides 2 PWM outputs, which can be used for servos, fan speed control, etc.:
| Pin | Notes |
|---|---|
| PC6 | Servo / BLTouch control |
| PF8 | IN / PWM_OUT |
BL-Touch
| Function | Pin |
|---|---|
| Servo Signal | PC6 |
| Probe Signal | PC3 |
EXP Interface
- The EXP header is commonly used for screens like the Mini12864 or for expansion peripherals.
- If a pin is already used by SPI, UART, endstop, fan, or other functions, do not configure it again for EXP peripherals.
EXP1
| Function | Pin |
|---|---|
| EXP1_1 | PE12 |
| EXP1_2 | PE13 |
| EXP1_3 | PB2 |
| EXP1_4 | PG8 |
| EXP1_5 | PC14 |
| EXP1_6 | PC13 |
| EXP1_7 | PG14 |
| EXP1_8 | PG13 |
| EXP1_9 | GND |
| EXP1_10 | 5V |
EXP2
| Function | Pin |
|---|---|
| EXP2_1 | PA6 |
| EXP2_2 | PA5 |
| EXP2_3 | PB7 |
| EXP2_4 | PA4 |
| EXP2_5 | PB6 |
| EXP2_6 | PA7 |
| EXP2_7 | PG15 |
| EXP2_8 | RST |
| EXP2_9 | GND |
| EXP2_10 | NC |