Screen Wiring and Configuration
Screen Wiring
Important Safety Notice
- When connecting TFT or HDMI screens using FPC cables, ensure the device is completely powered off to prevent screen damage.
- When wiring the TFT screen, carefully confirm the insertion direction of the FPC cable to avoid reverse connection causing device malfunction.
- TFT Resistive Screen Wiring
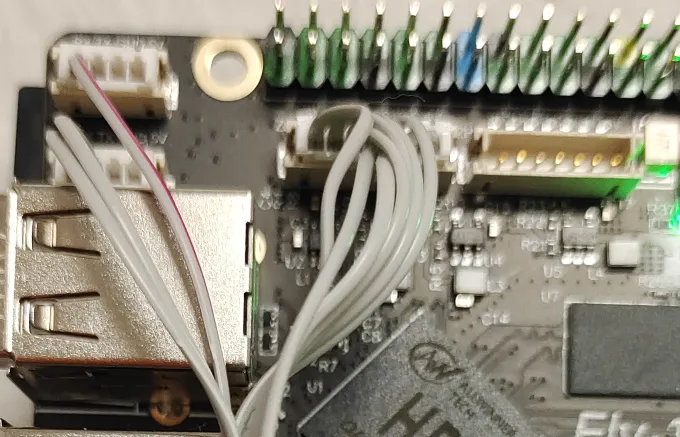
- TFT V1 Cable Wiring
- HDMI Wiring
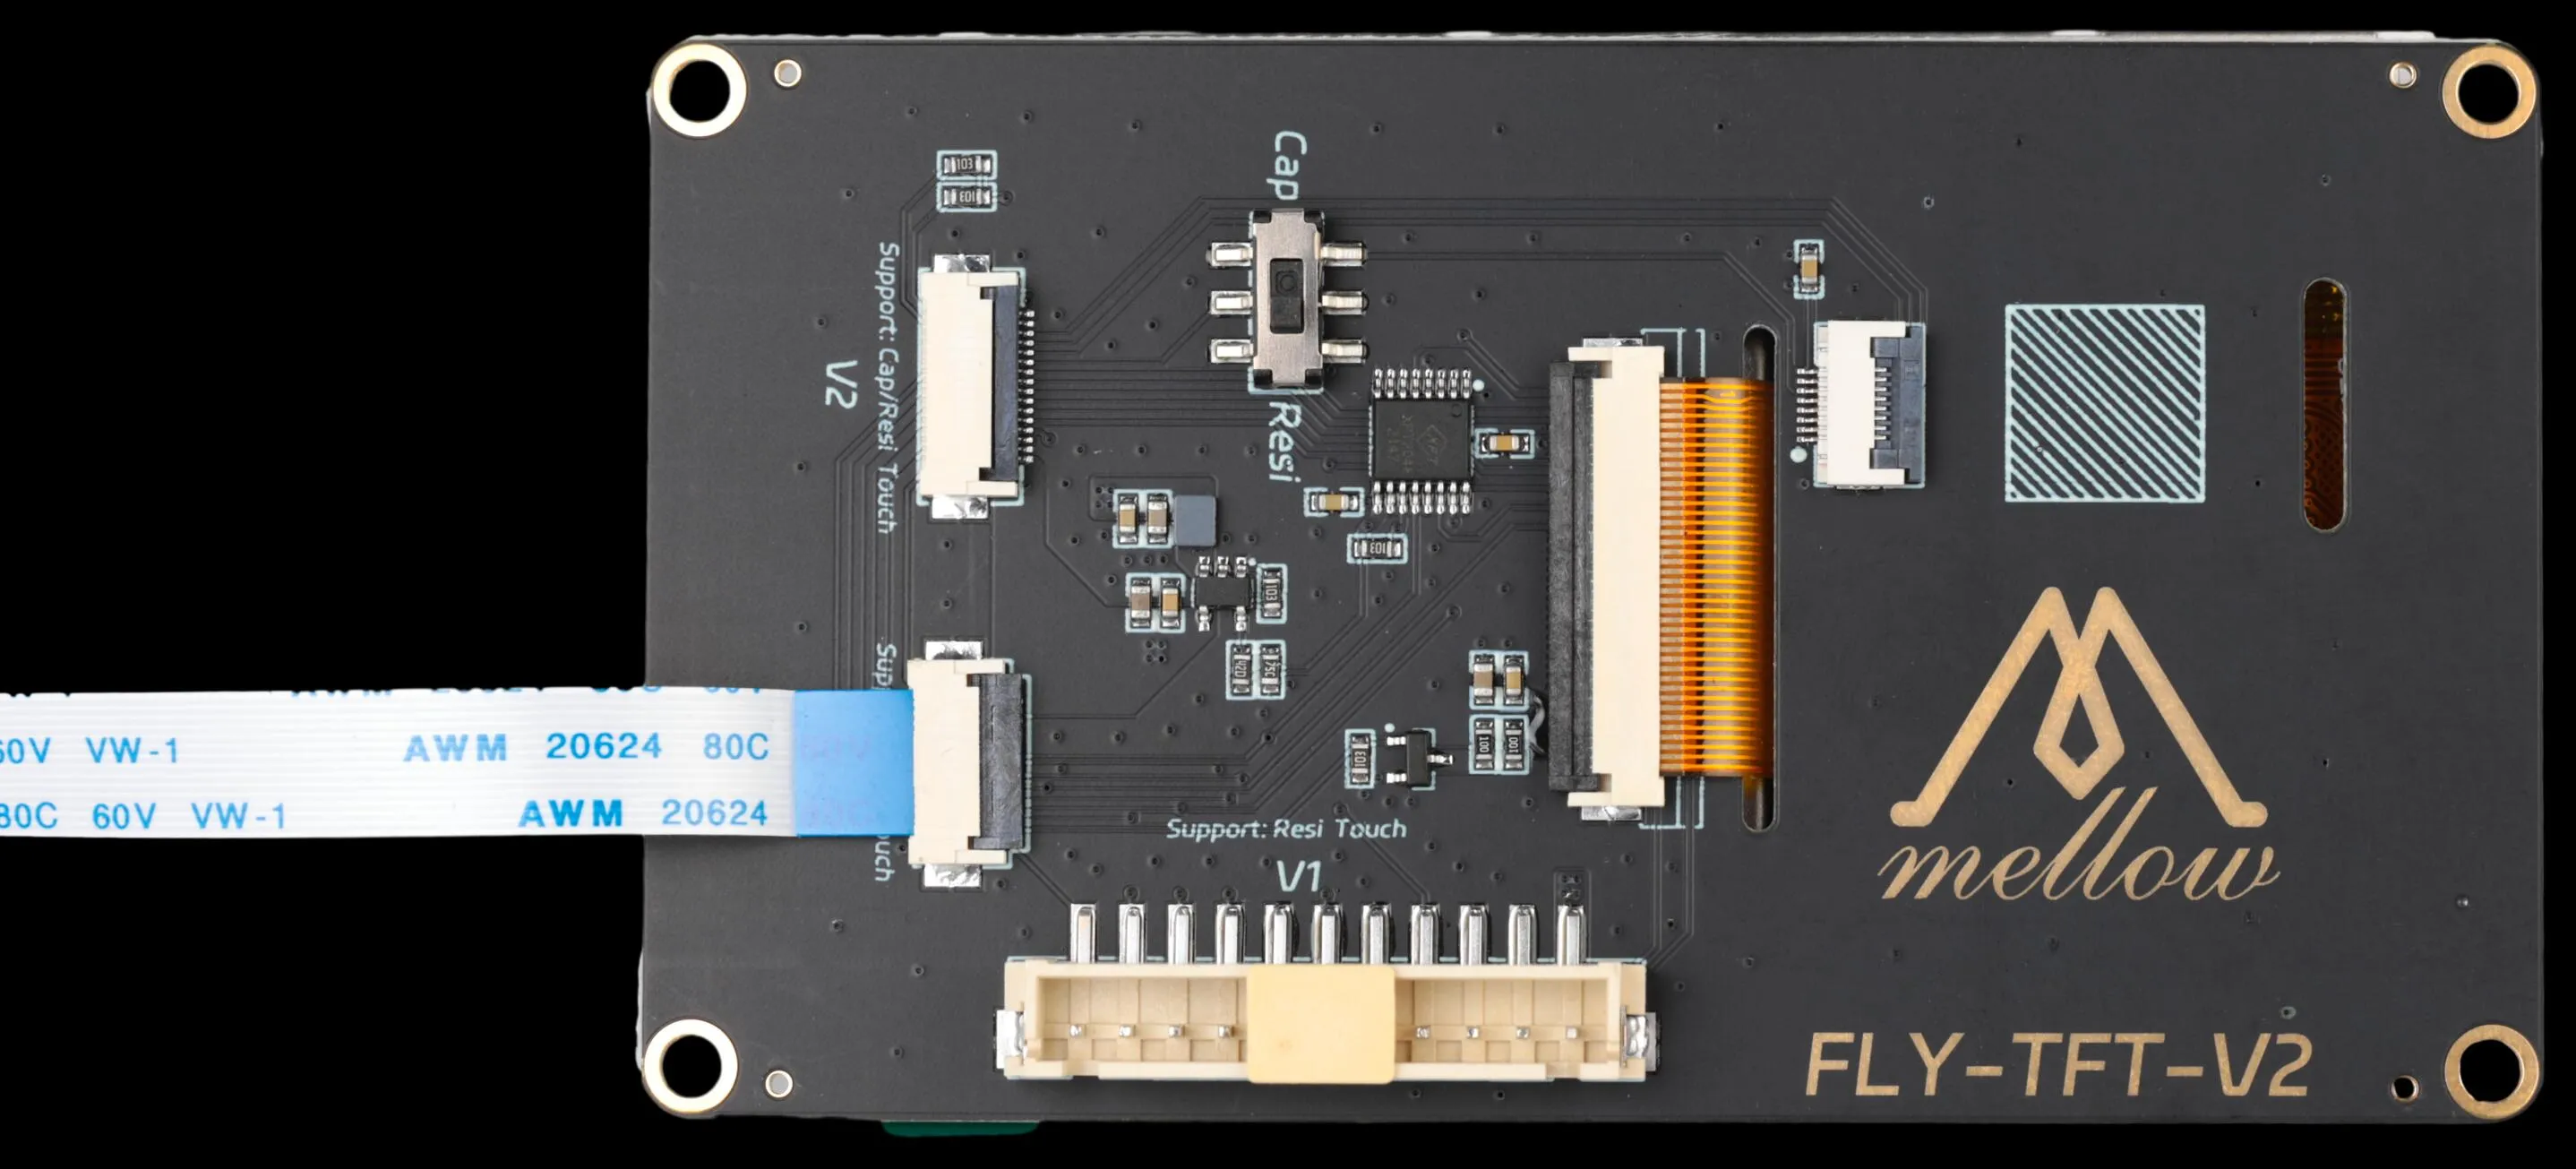
TFT Resistive Screen Wiring
tip
- The TFT screen package includes two FPC cables:
14P (narrow cable)and16P (wide cable). - For resistive screens, always use the
14P (narrow cable).
|
 |
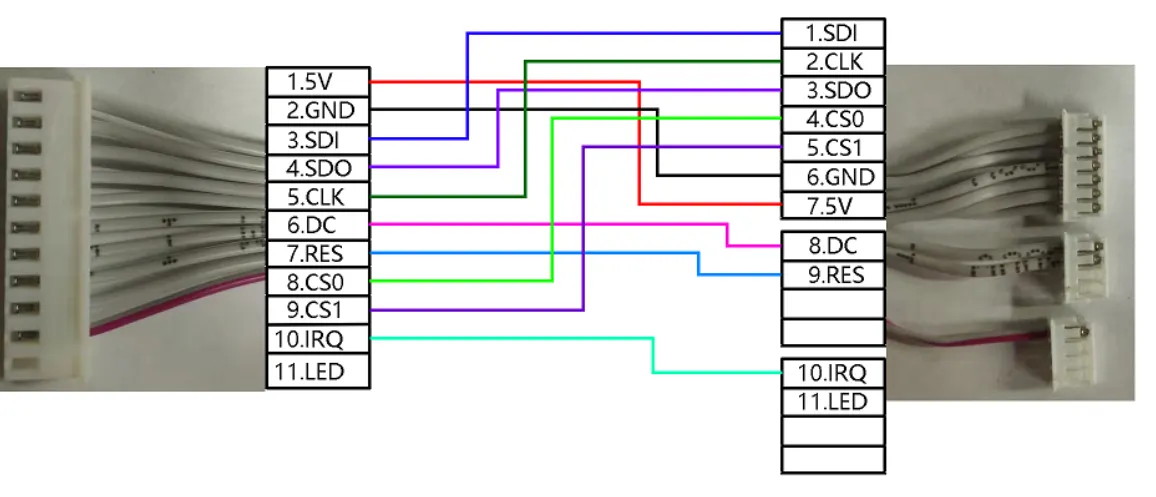
TFT Resistive Screen Cable Wiring
tip
- Pay attention to the cable pinout sequence to ensure correct connection.
 |
 |

Screen Configuration
- FLYOS-FAST System
FLYOS-FAST System Screen Configuration
- Access the device IP address via a browser, e.g.,
http://192.168.6.110/
 |
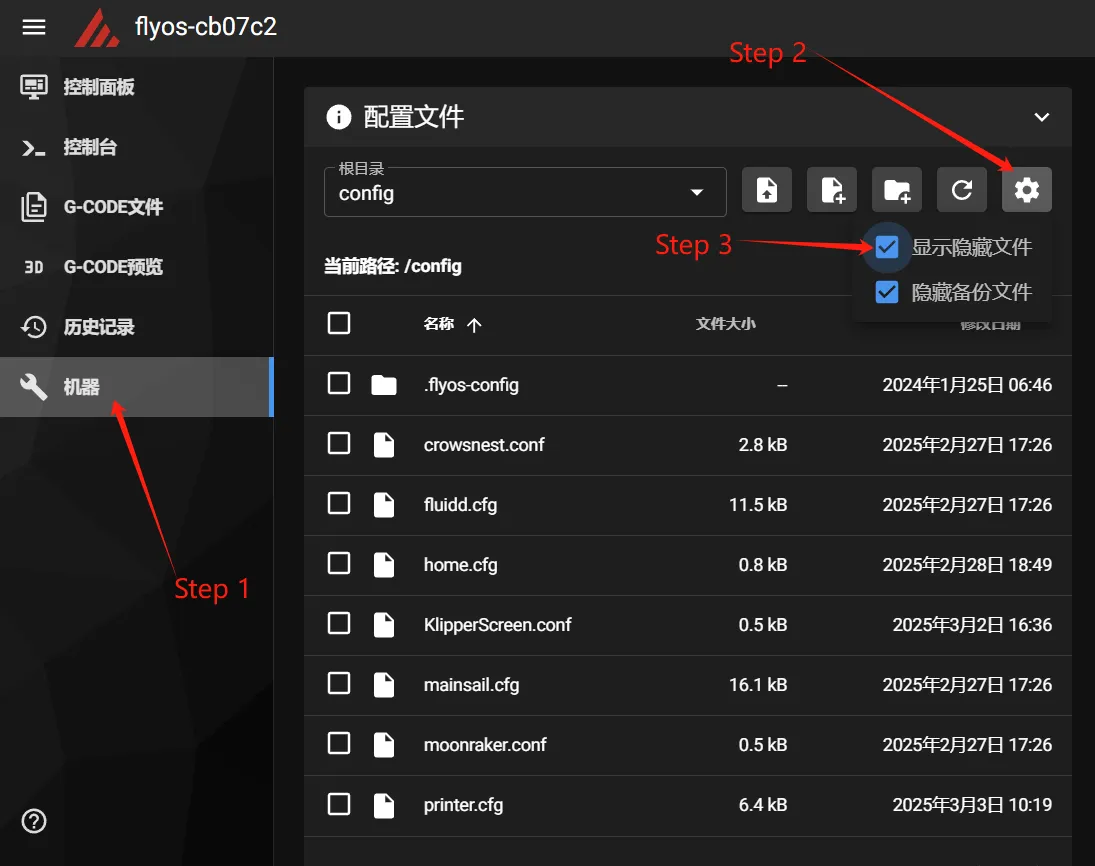 |
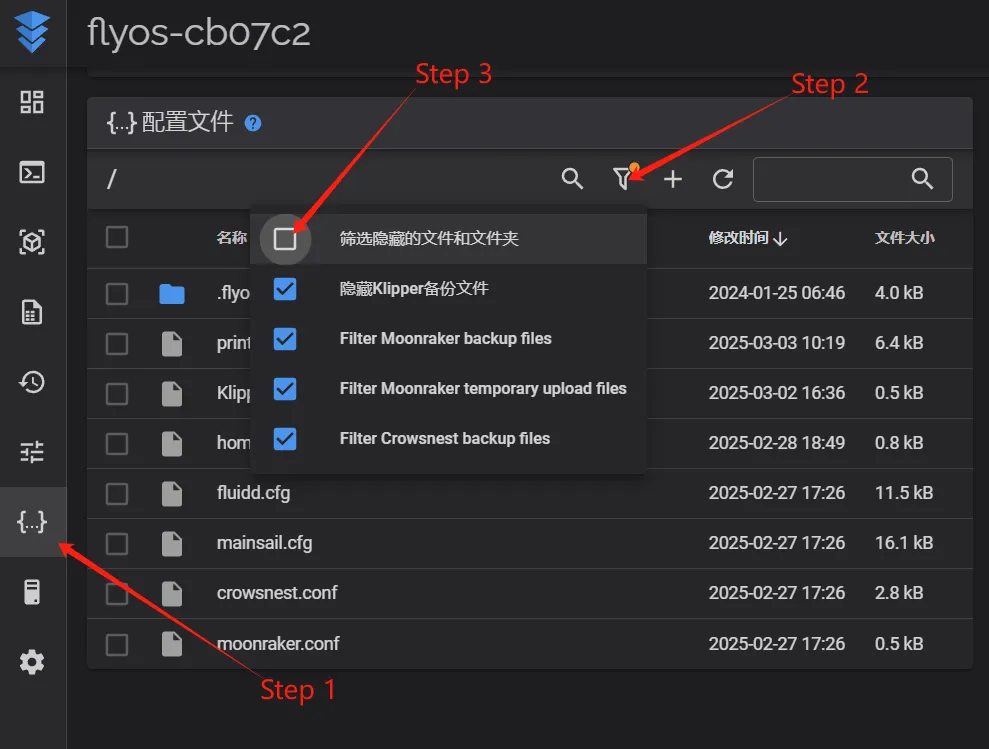
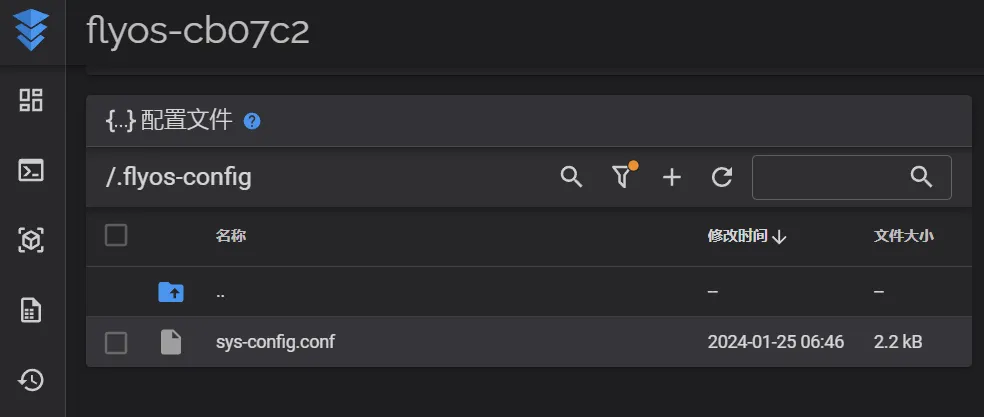
- Navigate to the displayed
.flyos-configfolder and find thesys-config.confconfiguration file.
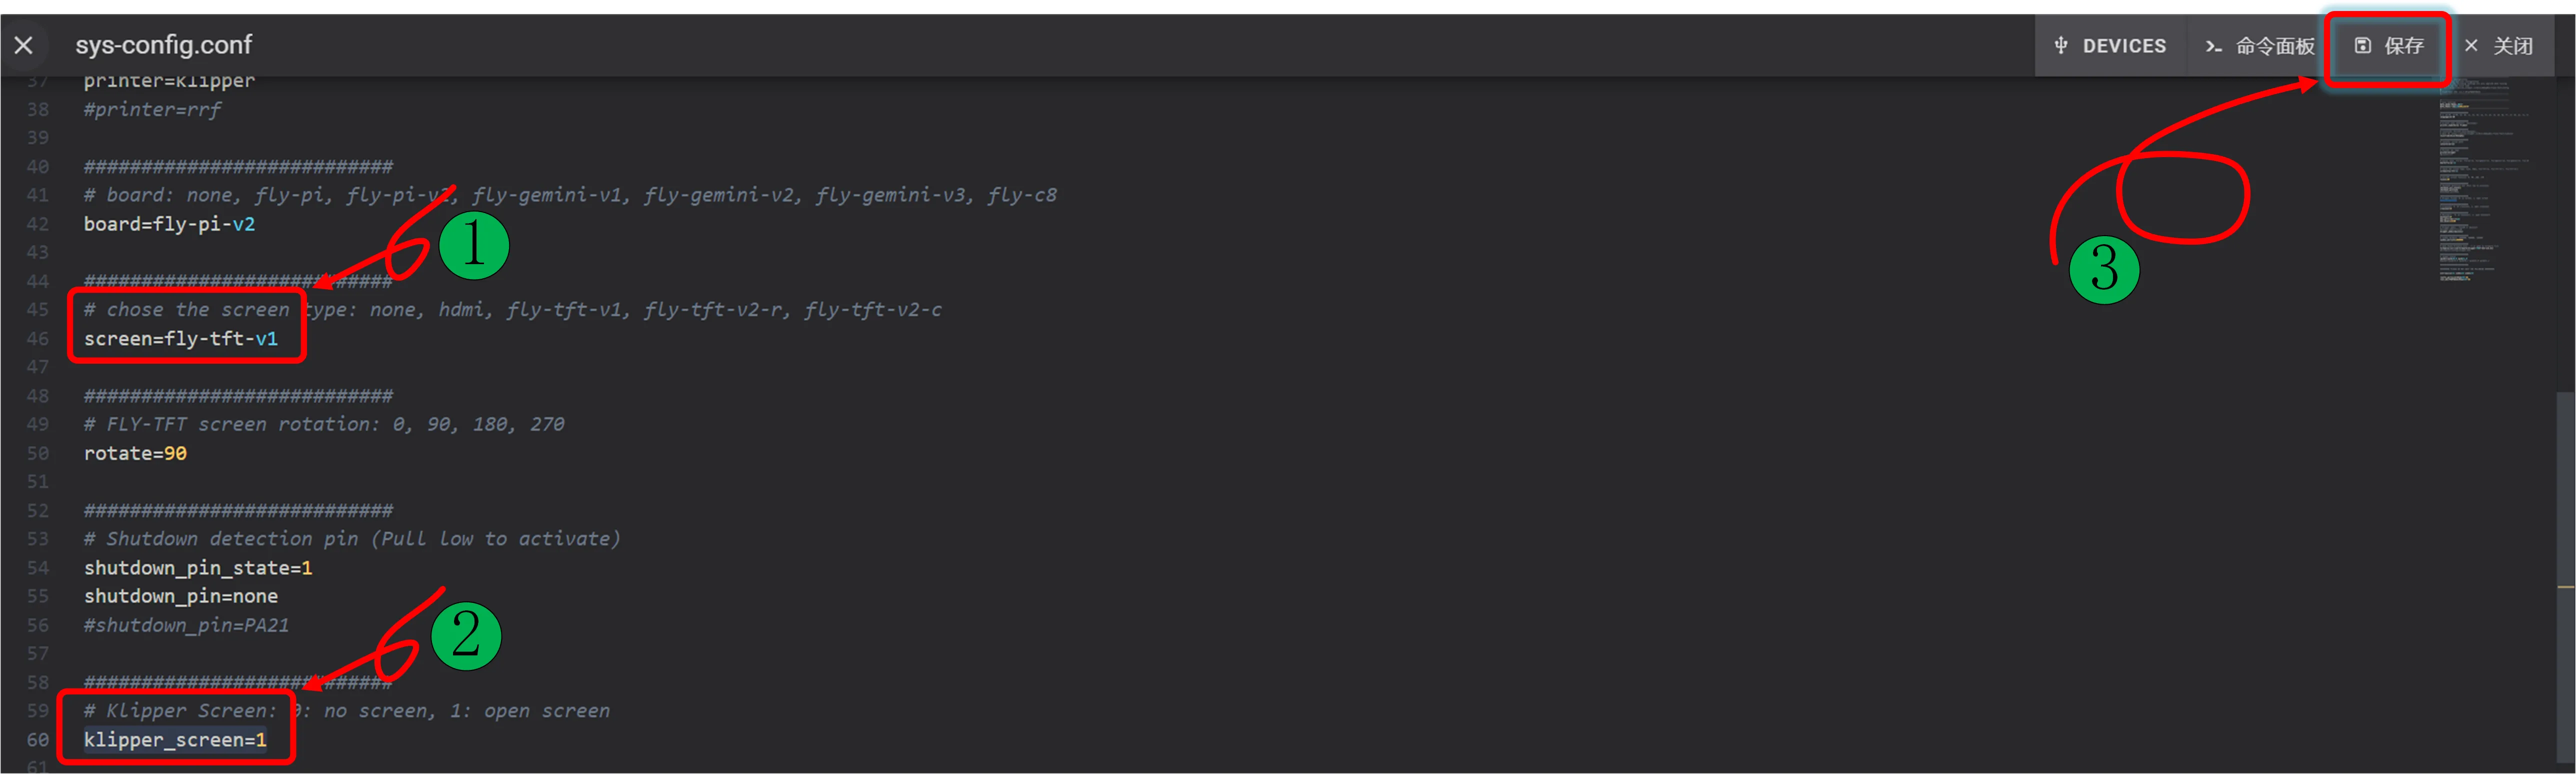
- Edit the
sys-config.conffile and modify the corresponding configuration items based on the screen type.
- TFT Resistive Screen Configuration Method
- HDMI Screen Configuration Method
- Change the text after
screen=tofly-tft-v1. - Change
klipper_screen=0toklipper_screen=1. - Below is the modified reference:
screen=fly-tft-v1
- Also modify:
klipper_screen=1
- Change the text after
screen=tohdmi. - Change
klipper_screen=0toklipper_screen=1. - Below is the modified reference:
screen=hdmi
- Also modify:
klipper_screen=1
Configuration Notes
- Ensure the DIP switch on the back of the screen is correctly set: For resistive screens, set to
Resi. - The configuration file format must be
key=value. No spaces are allowed after the equals sign. - Do not modify the configuration file format arbitrarily, otherwise the configuration will not take effect.
- After saving the configuration, restart the system for the changes to take effect.
Loading...