Pin Distribution
- This page lists the pin distribution of the FLY-Micro4 mainboard after flashing Klipper firmware. Pin numbers are based on the mainboard schematic.
UART/CSis the driver communication pin: used as UART with TMC2209, or as chip selectCSwith SPI drivers such as TMC5160. The same pin is shared for both functions.ENis the enable pin. In Klipper configuration, it is typically active-low (with!prefix inenable_pin).DIAGis the driver diagnostic signal pin. When using sensorless homing, configure the correspondingdiag_pinaccording to the table below.
Interactive Pin Hotspots
The image below uses the FLY-Micro4 product image and the same hotspot data from the Klipper configuration generator. Use the device filters above to show only compatible connectors; click a hotspot to see compatible devices, common Klipper configuration sections, and notes. Use “Locate in pin table” in the detail panel to jump to and highlight the corresponding row below. Hover still shows the connector name and pin. Always verify the silkscreen and connector positions against the physical board and schematic.
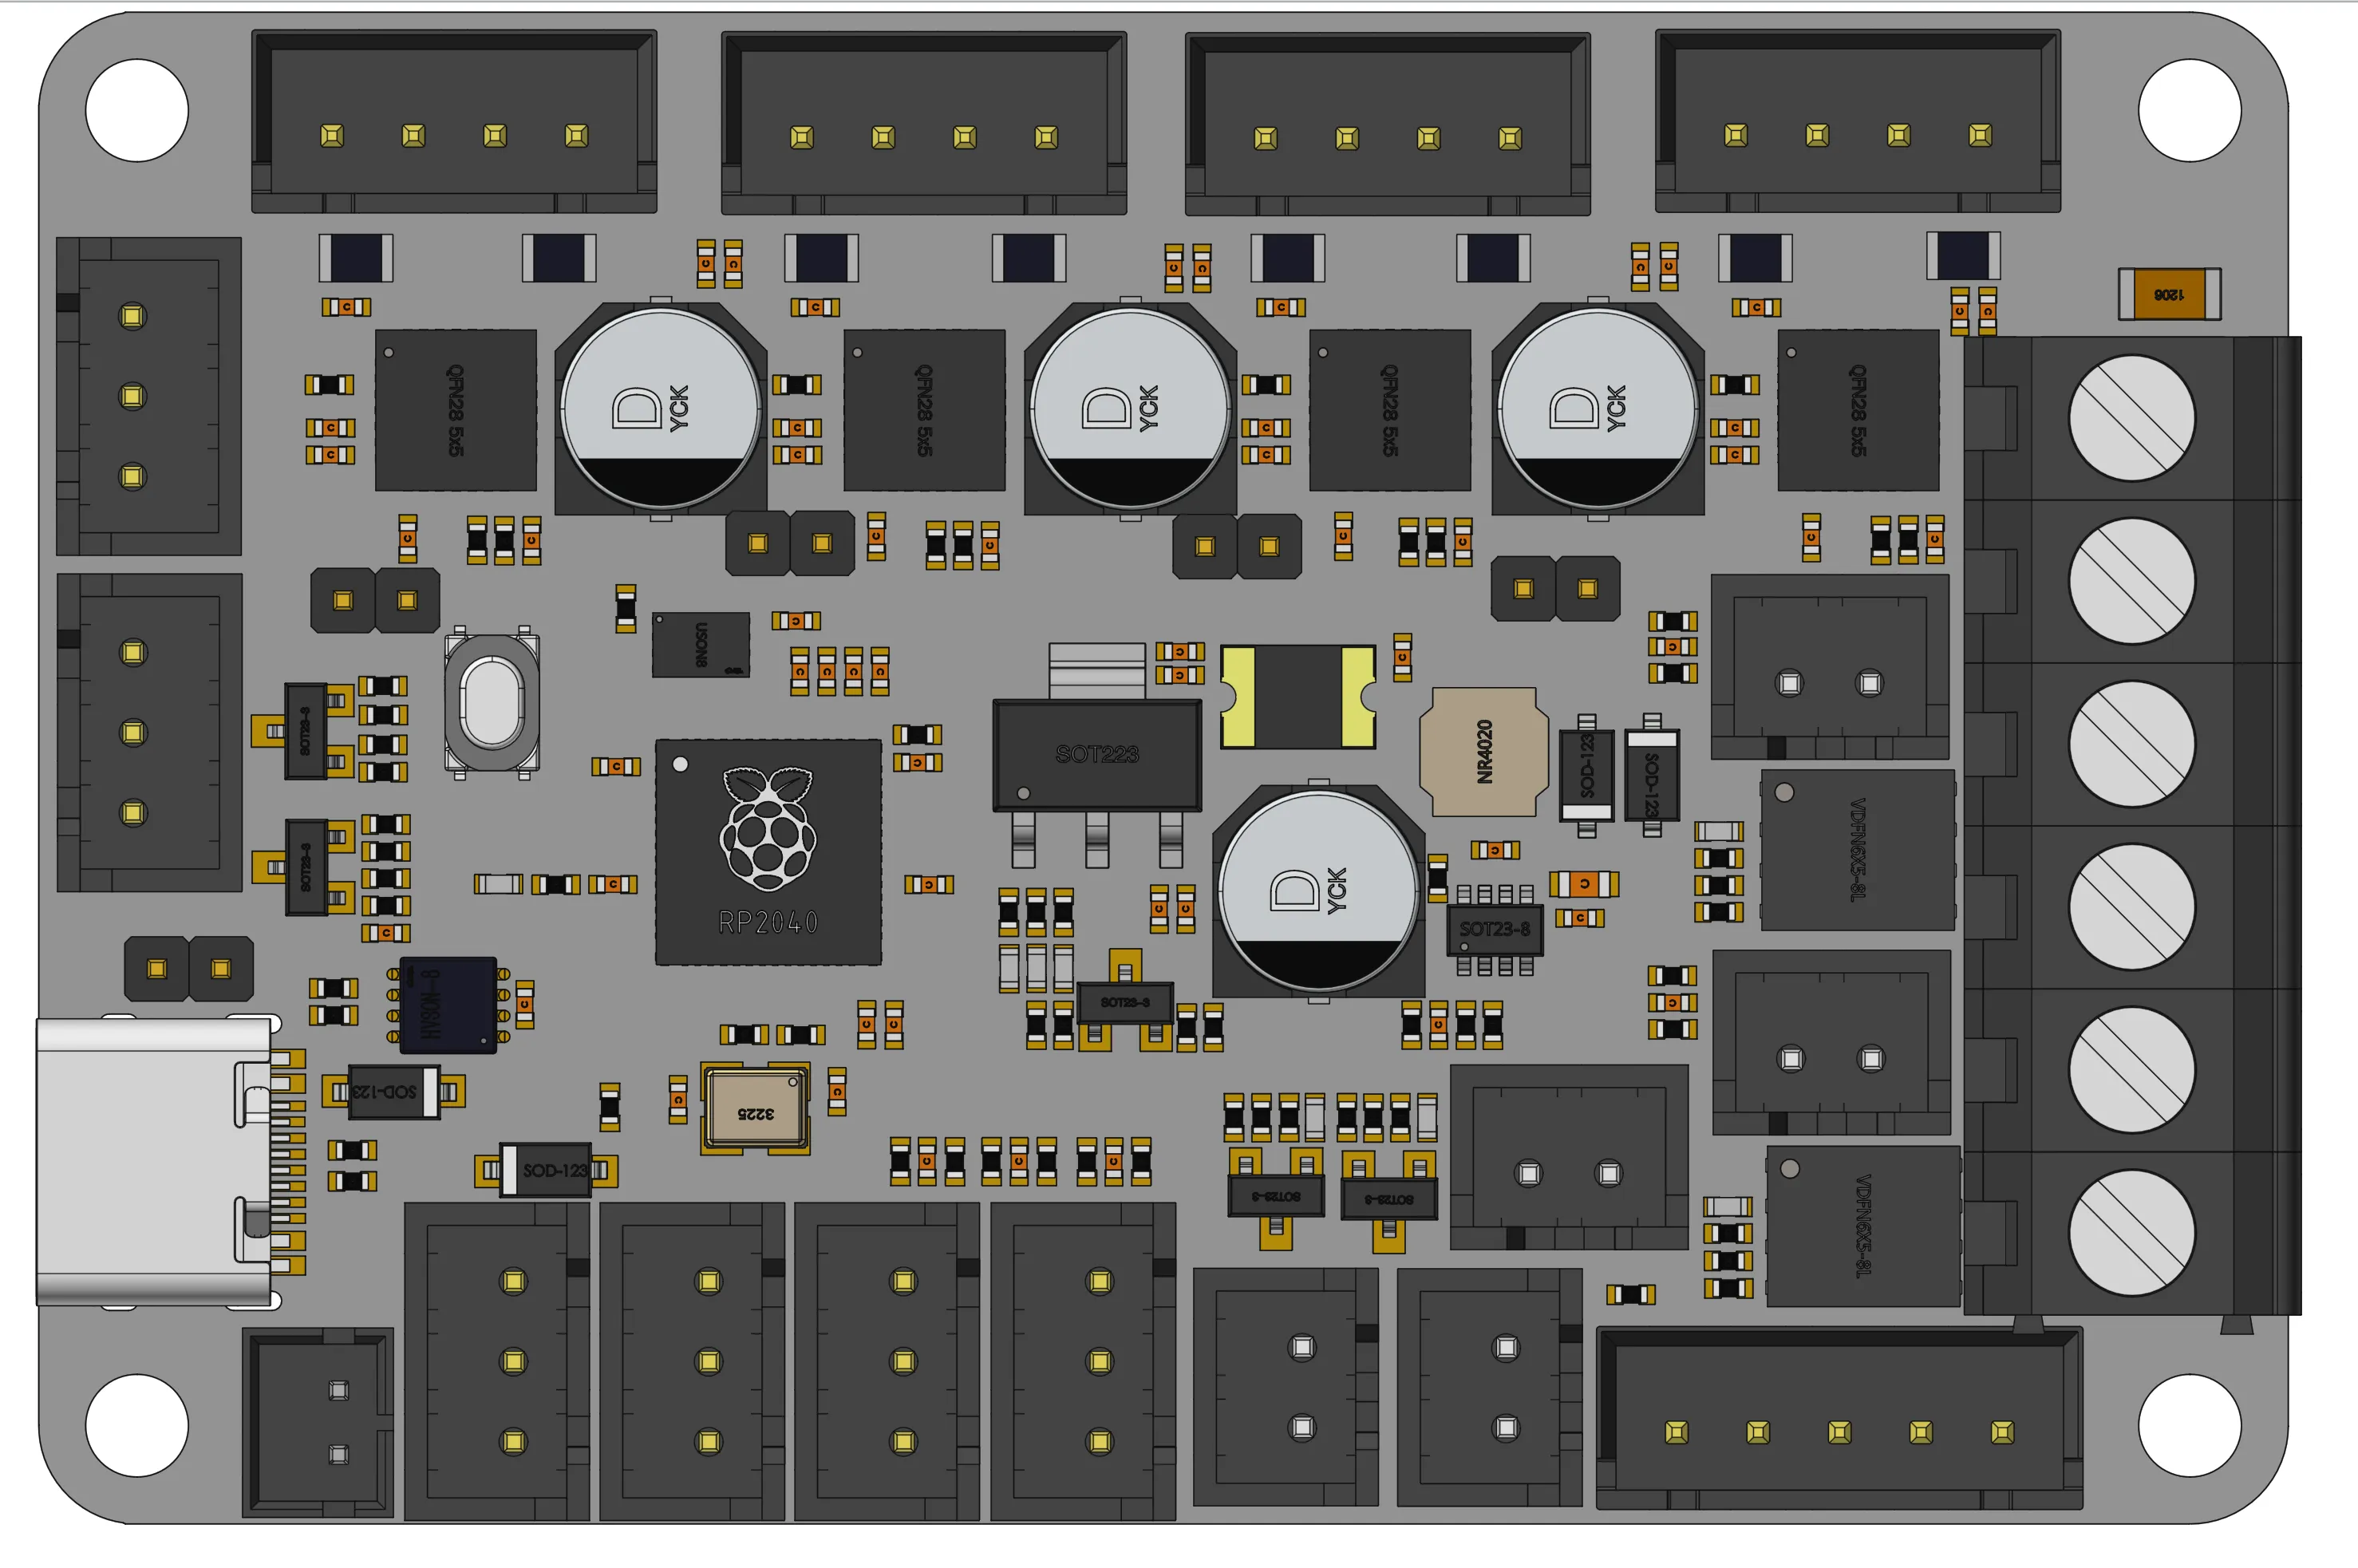
Hover to see the pin; click a hotspot to view compatible devices and configs. Pins can be copied from the detail panel, except for driver connectors.
Driver Pins
The FLY-Micro4 provides 4 driver ports:
| Driver | STEP | DIR | EN | UART/CS | DIAG |
|---|---|---|---|---|---|
| DRIVER0 | gpio6 | gpio3 | gpio7 | gpio9 (address 0) | gpio13 |
| DRIVER1 | gpio1 | gpio0 | gpio2 | gpio9 (address 1) | gpio14 |
| DRIVER2 | gpio26 | gpio25 | gpio27 | gpio9 (address 2) | gpio15 |
| DRIVER3 | gpio23 | gpio22 | gpio24 | gpio9 (address 3) | gpio12 |
Before starting, completely turn off the printer and disconnect the power supply. Do not plug or unplug wiring harnesses, organize connector wiring, or touch terminals while the power is on.
In the table, rows where the Corresponding Driver DIAG is not - indicate that the driver's DIAG signal is connected to the corresponding input pin on the main controller. When enabling sensorless homing, configure diag_pin directly according to the table. The corresponding input pin will be occupied by the DIAG signal; do not connect mechanical or optical endstop switches to it simultaneously.
Endstops and Probe
| Function | Pin | Corresponding Driver DIAG |
|---|---|---|
| Endstop port 0 / IO3 | gpio12 | DRIVER3 |
| Endstop port 1 / IO2 | gpio13 | DRIVER0 |
| Endstop port 2 / IO1 | gpio14 | DRIVER1 |
| Endstop port 3 / IO0 | gpio15 | DRIVER2 |
| Probe / IO4 | gpio18 | - |
For wiring of micro switches, optical endstops, proximity sensors, and TAP, see: Endstop Wiring Guide
Heating
| Function | Pin |
|---|---|
| Heater port 0 | gpio20 |
| Heater port 1 | gpio21 |
Temperature Sensors
| Function | Pin |
|---|---|
| Thermistor port 0 | gpio28 |
| Thermistor port 1 | gpio29 |
The thermistor ports support NTC thermistors (100K) by default, with sensor_type recommended as Generic 3950; they also support 2-wire PT1000, configured by setting sensor_type to PT1000.
List of
sensor_typeoptions that can be directly connected internally by Klipper and their applicable scenarios: Thermistor Configuration Method
K-type thermocouples, 3-wire PT100, etc., require additional signal conditioning chips and cannot be connected directly to the thermistor ports.
Fans
| Function | Pin |
|---|---|
| Fan port 0 | gpio16 |
| Fan port 1 | gpio17 |
PWM
The FLY-Micro4 provides 3 PWM output channels, which can be used for servos, fan speed control, etc.:
| Pin | Remarks |
|---|---|
| gpio10 | Laser |
| gpio11 | RGB / Neopixel |
| gpio19 | Servo / BLTouch control |
BL-Touch
| Function | Pin |
|---|---|
| Servo signal | gpio19 |
| Probe signal | gpio18 |
RGB
| Function | Pin |
|---|---|
| RGB / Neopixel | gpio11 |
Display / EXP Notes
The FLY-Micro4 does not provide standard EXP1 / EXP2 12864 pin headers. Please use the dedicated interfaces listed on this page for drivers, endstops, BL-Touch, RGB, Laser, etc. Do not apply the EXP1 / EXP2 pin tables from other mainboards.